

Beauty & Personal Care
DIY Lash Extension Kit : Your Ultimate Guide to Flawless Lashes at Home
Lash Extension Kit : Are you tired of spending a fortune at the salon for lash extensions? Or maybe you’re too busy to schedule regular appointments. Whatever your reason, the good news is that you can now achieve beautiful, fluttery lashes at home with a DIY lash extension kit.
Here, we’ll guide you through the factors to consider when choosing an at-home lash extension kit, review the top 5 best kits on the market, and provide a step-by-step guide to applying lash extensions at home. Plus, we’ll answer some common questions and concerns about DIY lash extensions.
5 Best At-Home Lash Extension Kits
| Image | Product | Buy On Amazon | Rating |
|---|---|---|---|
 | All-In-One False Eyelashes Kit for Beginners | AMAZON | 4.4 |
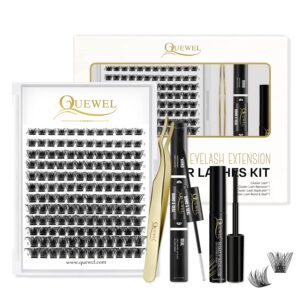 | DIY Eyelash Extensions Kit | AMAZON | 4.3 |
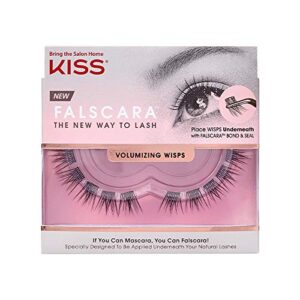 | KISS Falscara DIY Eyelash Extension Volumizing Wisps | AMAZON | 4.2 |
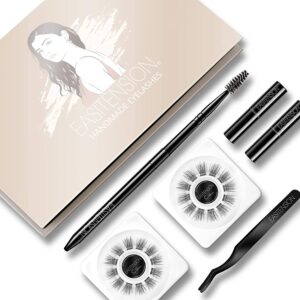 | EASITENSION DIY Eyelash Extension | AMAZON | 4 |
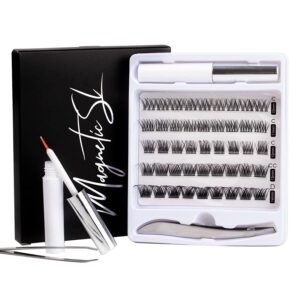 | DIY Eyelashes Extensions | AMAZON | 3.8 |
Factors to Consider When Choosing an At-Home Lash Extension Kit
Before you buy a lash extension kit, there are a few factors to consider to ensure you choose the right one for your needs:
Type of lash extension kit:
There are two types of lash extension kits – strip lashes and individual lashes. Strip lashes are pre-made lashes that are attached to a strip and applied to the lash line. Individual lashes come in small clusters or single strands and are applied directly to the natural lashes.
Adhesive type: The two most common adhesive types are glue and magnetic. Glue requires careful application and can cause irritation if not used correctly. Magnetic lashes use tiny magnets that attach to your natural lashes without the need for glue.
Lash material:
Lashes can be made from synthetic, mink, or silk fibers. Synthetic lashes are the most affordable and durable, while mink lashes provide a more natural look. Silk lashes are lightweight and have a glossy finish.
Lash curl, length, and thickness options: The kit you choose should offer a variety of options for lash curl, length, and thickness to customize your look.
Other factors to consider: Make sure to check for any allergies you may have, the difficulty level of the kit, and the tools included in the kit.
Here are some popular at-home lash extension kits that you might want to consider:
Lashify: Lashify is a popular DIY lash extension kit that offers customizable lashes with different lengths and styles. They use a unique “Gossamer” technology that creates a natural look and can last up to a week. They also offer a variety of adhesives, tools, and accessories to make the application process easier.
Ardell Duralash Starter Kit: Ardell is a well-known brand in the lash extension industry, and their Duralash Starter Kit is a great option for beginners. This kit includes individual lashes, adhesive, and tweezers for easy application. They also offer a variety of lash lengths and thicknesses to customize your look.
Lash Tavern Pro Classic Starter Kit: This kit includes all the tools and products you need to create classic lash extensions, including silk lashes, adhesive, and tweezers. The kit offers a variety of lash sizes and thicknesses to customize your look, and the lashes can last up to 2-3 weeks.
Sugarlash PRO Classic Kit: This kit includes high-quality synthetic lashes, adhesive, and all the tools you need to apply lashes like a pro. The kit comes with a detailed instruction manual and video tutorial, making it easy to learn the application process.
Sky Organics Castor Oil Lash Growth Kit: If you’re looking for a natural way to enhance your lashes, the Sky Organics Castor Oil Lash Growth Kit is a great option. The kit includes a bottle of organic castor oil, a spoolie brush, and a set of mascara wands to apply the oil to your lashes. Castor oil is known to promote lash growth and strength, making it a popular natural alternative to lash extensions.
Step-by-Step Guide to Applying Lash Extensions at Home
Step 1: Prepare the eye area by cleansing your lashes and applying an under-eye pad to protect your skin.
Step 2: Using the applicator tool, apply a small amount of adhesive to the base of the lash extension.
Step 3: Place the lash extension as close to your natural lash line as possible, and hold it in place until the adhesive dries.
Step 4: Repeat until you’ve achieved your desired look, and let the adhesive dry completely before applying makeup or washing your face.
Step 5: To remove the lashes, gently use a lash glue remover or oil-based cleanser to dissolve the adhesive and slide the lashes off.
Frequently Asked Questions
Q: How long will my extensions last?
A: Depending on the adhesive and lash material, extensions can last anywhere from 2-4 weeks with proper care and maintenance.
Q: Will the adhesive damage my natural lashes?
A: If applied correctly and removed gently, lash extension adhesive should not damage your natural lashes. However, it’s important to choose a high-quality, gentle adhesive and avoid pulling or tugging on your lashes.
Q: Can I wear makeup with lash extensions?
A: Yes, you can wear makeup with lash extensions, but avoid using oil-based products that can break down the adhesive. Use a water-based mascara and avoid using eyeliner directly on the lash line.
Q: How do I remove the extensions?
A: To remove the extensions, use a lash glue remover or oil-based cleanser to dissolve the adhesive and gently slide the lashes off.
Conclusion
With the right at-home lash extension kit and some practice, you can achieve beautiful, fluttery lashes without ever leaving your home.
Consider the factors we’ve outlined, choose the kit that’s right for you, and follow our step-by-step guide for flawless results. Don’t forget to share your stunning new look with friends and family!